New Construction Fails, part four: Improperly Sloped DWV Piping
From early building phases, to the pre-drywall walkthrough, to the final walkthrough, new construction is NOT immune to problems / defects / improper building practices.
If you find that hard to believe, we’ve written this post for you!
This is Part FOUR in a series of posts where we’ll continue showing you the sorts of things we catch on home inspections of new construction homes. Maybe you’ll be surprised by some of these…but we hope–if you plan to buy new construction–that you don’t have to be surprised by seeing them in your own house after you’ve moved in!
Improperly Sloped DWV Piping
In your house there are many various kinds of pipes making up the plumbing (and in some cases, HVAC) system. If you were to walk into an unfinished part of your home, or a utility room of some kind, perhaps you can look around and see some of them. Depending on the age and the kinds of systems in your home, you might find ABS, Black Iron, Cast Iron, Copper, CPVC, Galvanized Steel, Lead, Polybutylene, PVC, or other materials! You’d probably see a combination of the above list.
When inspecting for proper sloping of pipes, we are specifically focused and concerned with the DWV (Drain/Waste/Vent) plumbing. We don’t care about slope for supply piping because the water in those pipes is pressurized and travels through the home regardless of pipe slope.
The DWV plumbing in your home is different from the supply piping in that it relies on gravity to drain (or vent)–and that’s why how these pipes are sloped is so important. Improperly sloped DWV piping will mean problems!
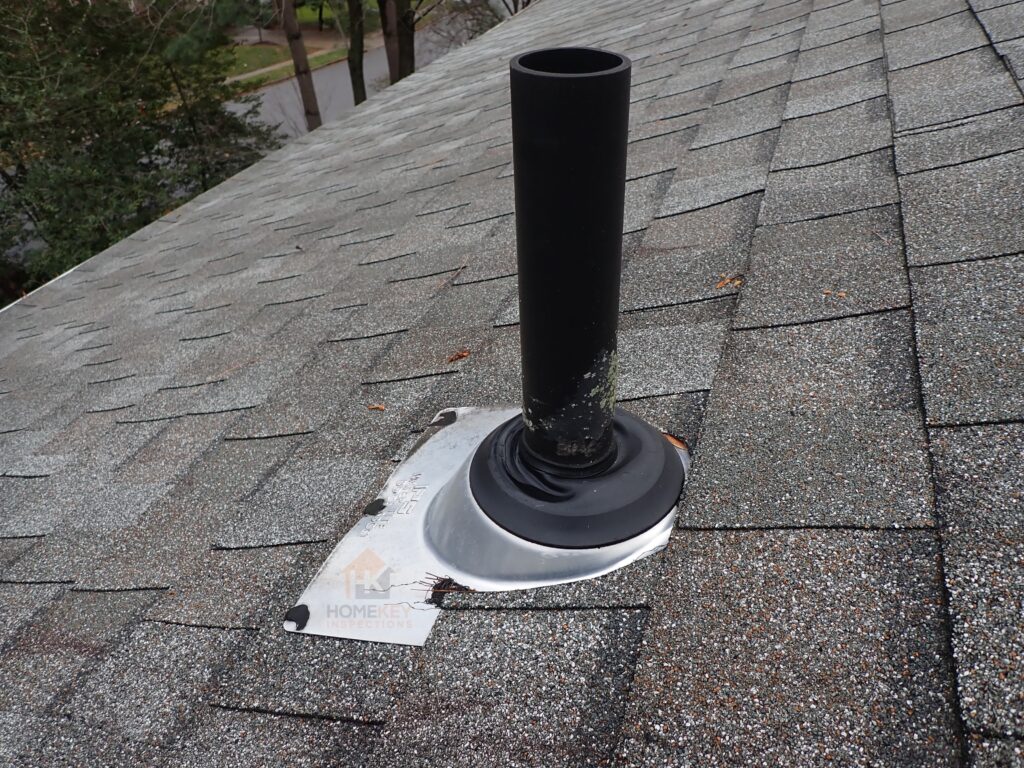
This pipe is part of the DWV system. Every house has one or more of these, which allow sewer gases to exit to the exterior of the home rather than getting inside. This opening to outside through the roof also allows for wastewater (water draining from toilets) and grey water (water from sinks, tubs, dishwashers, etc) to freely flow through the DWV piping to the sewer or septic system. This vent pipe has also recessed and created a place for water to collect in the collar, but that's beyond the subject of this post 🙂 Note: This photo if not from a New Construction home; its purpose is simply to illustrate a roof plumbing vent. We'll look at some photos from a newly-built home below.
How are DWV pipes supposed to be sloped?
A properly sloped DWV pipe should have a drop between 1/4″ per foot (minimum) and 3″ per foot (maximum), unless it is a vertical pipe. If sloped less than the minimum, pipes will be prone to getting clogged. If greater than the maximum slope, pipes will drain in such a way that the solids are left behind, rather than draining together with the fluids through the system.
During a home inspection, your home inspector will not be measuring and using a level for every stretch of pipe (that is outside of the scope of a home inspection). But he/she WILL be paying attention to pipe slopes (to the degree that pipes are visible during the home inspection), and will have the trained eye to investigate when slopes appear to be improper.
Example of improper sloping on a New Construction home
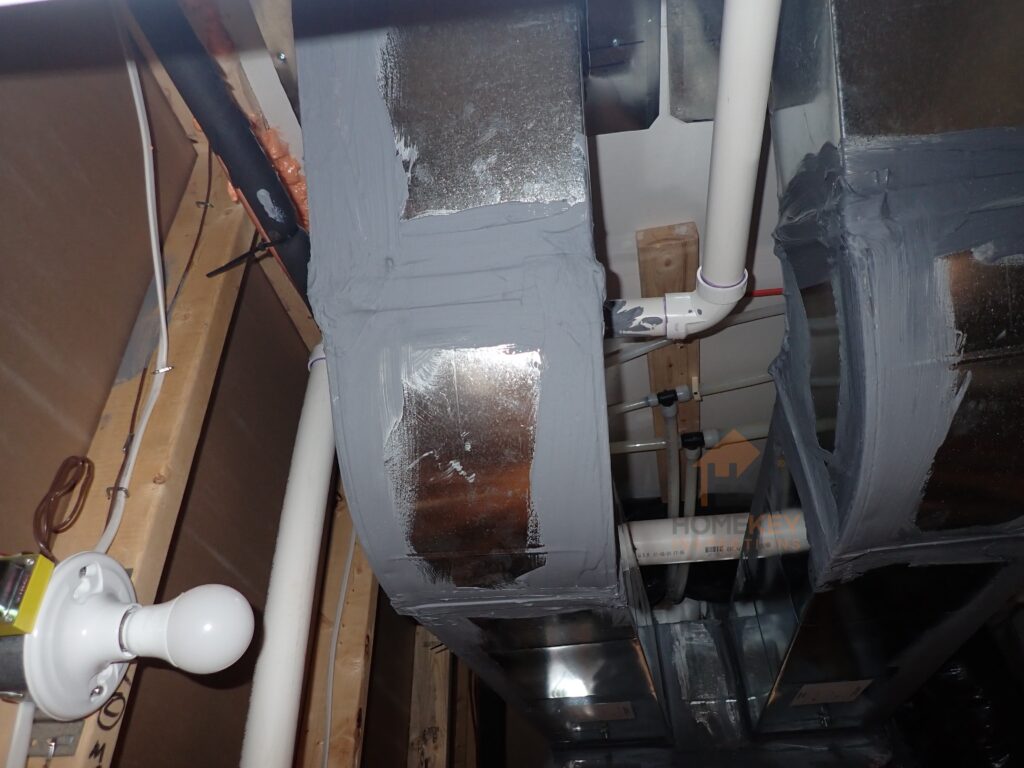
During a final walkthrough inspection, I (the author) was in the utility room and had started looking at some of the ductwork for the HVAC system, as well as the visible piping in the room. A portion of the DWV caught my eye and made me want to investigate further.
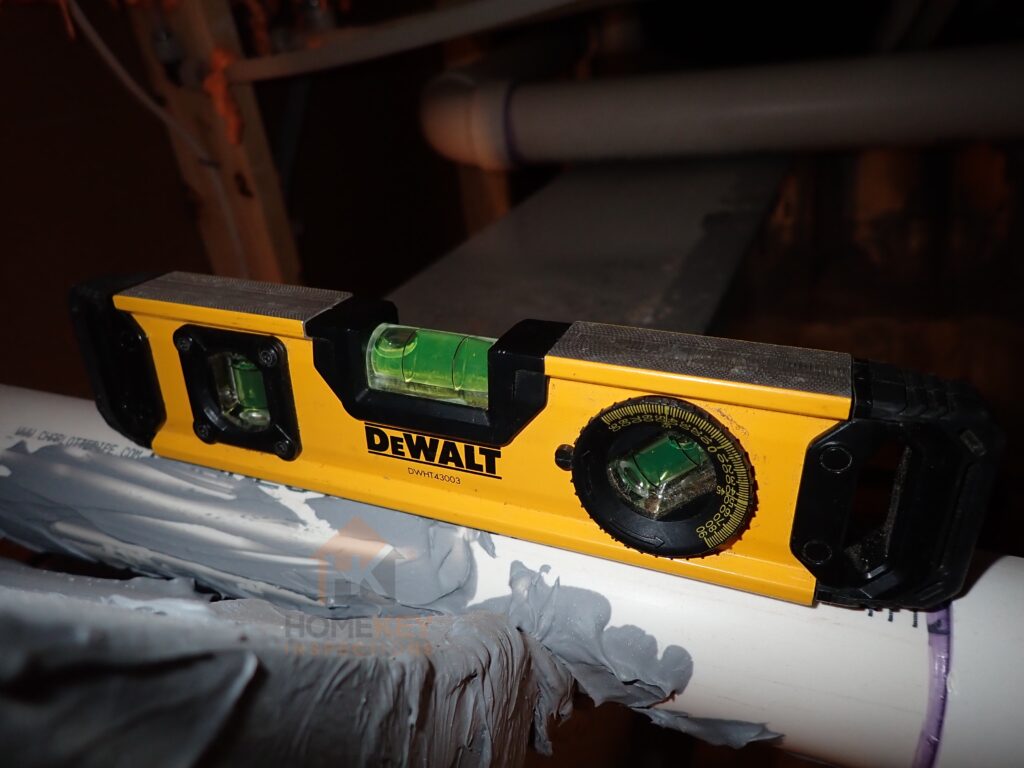
The pipe should be traveling steadily downwards within the acceptable window described earlier (1/4″-3″ per foot), and it looked to me like the pipe was actually sloping upwards when it should have sloping downwards. So I grabbed my stepladder and level, and then snapped these couple of photos:
Level shows the poor slope of the pipe.
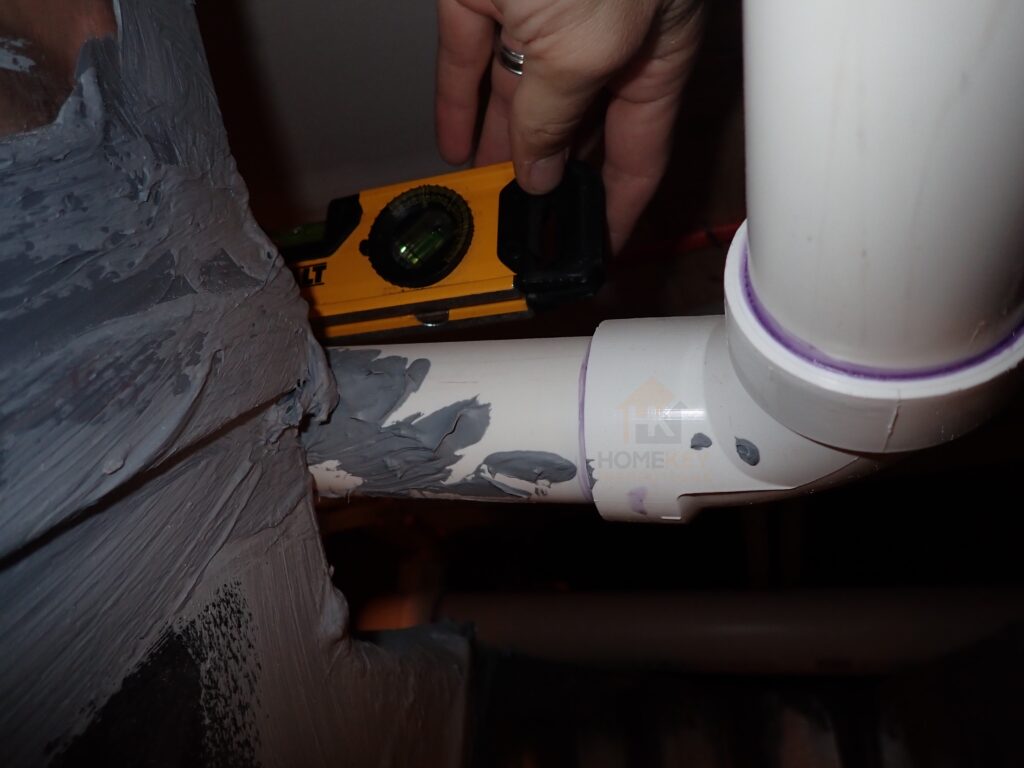
This is to indicate what a level pipe would have looked like (the slope was nowhere near what it needed to be to drain & vent properly).
Clogs and blockages
You can probably imagine what the result of a pipe with a dramatic dip like this might be. As water drains through this pipe, it would have collected here and been very prone to clogs and blockages. The homeowner would have probably tried dumping strong chemicals down the drain several times without lasting effect, only to then spend the money to get a plumber out to try and pinpoint and then fix the issue.
In this case it was fortunate that this section of piping was in a visible location so that the issue could be spotted and included in the home inspection report. It’s much easier to get the builder to fix an issue like this around the time of the final walkthrough than to run into a problem later on and pay out of pocket to identify and repair the issue!